This latest case study comes from Richard who was wanting to complete two jobs. First was to enable his front lawn to be a car parking area as there was only room for one car before this project. Second was to create a shed base for his recently purchased garden building.
Read on to see which product or products Richard decided to use and why:
Choosing X-Grid
The choice of product was a simple one for Richard. Last year his son had done a lot of research to find a suitable shed base and had used our X-Grid as his new foundation. He was so pleased with the outcome that he recommended X-Grid to Richard.
To make sure it was the right product for him, Richard started reading up on X-Grid to discover its many benefits such as being able to hold up to 420 tonnes per sqm, versatile, easy to install, UV & weather resistant and made from 100% recycled plastic.
“I chose your product because it was economical, looks easy to use and used recycled plastic – all important points. Following research last year my son used the grids for a shed base and was very happy with them.”
Richard ordered 21m² of green X-Grid, 8m² of black X-Grid, 10m of grey EcoLat lawn edging and a 1m x 12m roll of membrane.
X-Grid Driveway Installation
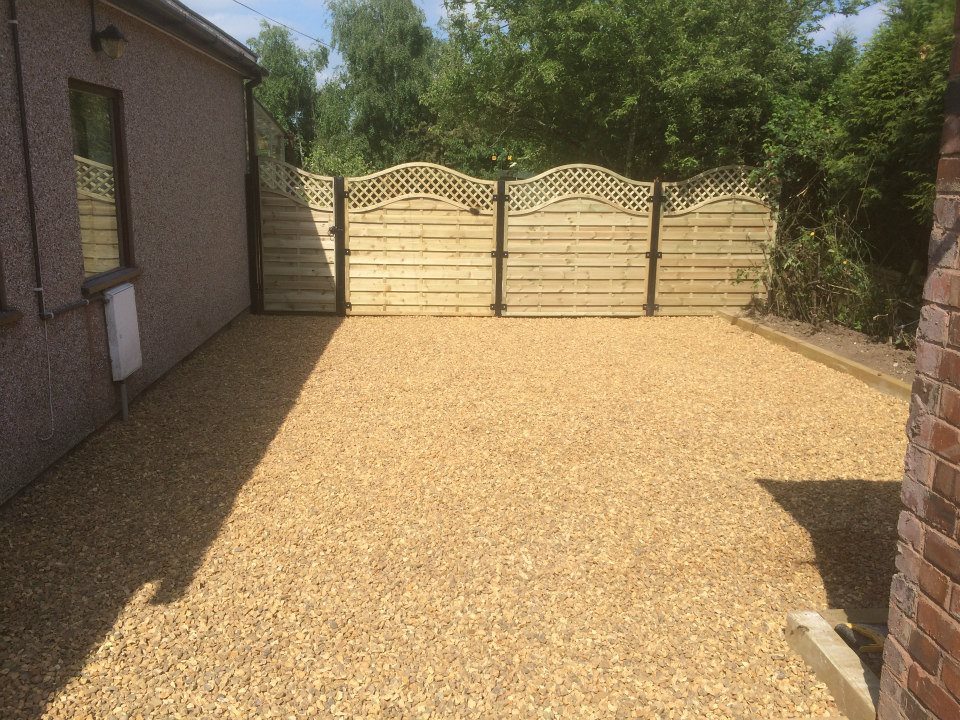
Richard’s plan was to completely replace the existing turf on his front garden with an X-Grid filled with recycled tyre chippings driveway creating a new parking space.
Richard’s first job was to remove the current turf and soil. Using a pick, shovel and wheelbarrow with some help from neighbours, he was able to remove 7 cubic metres of earth which he has kept to be used in raised sleepers in his back garden.
Next, Richard replaced the removed soil with the equivalent amount of hardcore before levelling and compacting as well as he could. On top of the hardcore he rolled out and cut to size his sheet of membrane to cover the entire area. Membrane is used to prevent weeds from growing up and through the X-Grid but still allows water to drain away naturally.
After laying the sheet of membrane, Richard could begin installing his green X-Grid. He started in one corner and laid one panel at a time, simply connecting neighbouring panels together using X-Grid’s slot and peg connecting system – this process was repeated until almost the entire area was covered. To finish the grid, a few panels had to be cut with a saw to fit perfectly within the existing boarders that you can see in the photos. This was a simple process for Richard to complete.
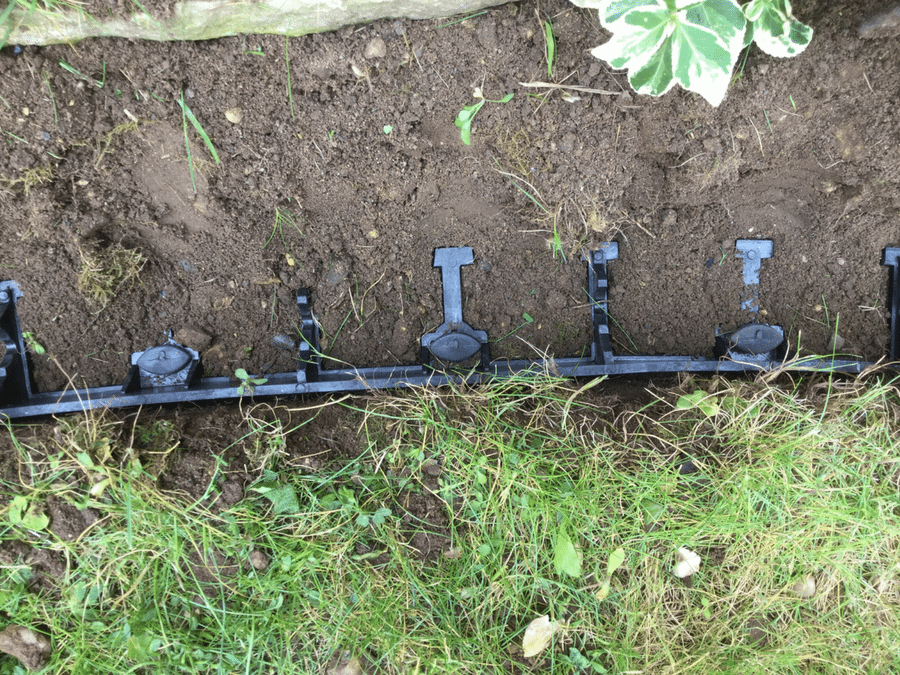
The second to last job was to install the EcoLat which you can see on the far side of the image. The lawn edging product was used to separated the driveway and a small patch of grass and soil. To install the edging, Richard dug a small trench where he wanted the edging before installing it and back filling with soil to ensure it would not move.
Finally, all that was left to do was to was fill the installed X-Grid with his recycled tyre chippings and start parking his car in the new space!
Richard told us: “I chose X-Grid for the driveway as it used less of the planet’s resources and was a simple and neat solution. In addition, I also needed a solution that allowed free drainage of water because of planning restrictions.”
Shed Base & Shed Installation
With his driveway finished, Richard set to work creating his shed base (which follows a very similar installation to the driveway) and building his shed.
To begin, Richard decided where he wanted his shed before measuring and marking out a 10ft x 7ft area. From here he removed a small layer of turf and soil to leave an exposed soil base.
On to the exposed soil, Richard laid a layer of hardcore (that he also used on his driveway) before levelling and compacting it as well as he could. He then rolled out and laid the remaining membrane sheet and secured it in place. The membrane will perform the same job as on the driveway, stop weeds from growing up and through the base while allowing water to still drain away from the shed.
The next job was to install the X-Grid base which he again completed similarly to the driveway. Starting in one corner and laying the panels one at a time, connecting them as he went along until the whole area had been covered. The final step of installing the base was filling the X-Grid with angular gravel – we estimate that around 8kg of gravel is required to fill each individual panel so you can roughly work out how much gravel you will need for your project.
Finally, with the base complete, Richard was left with the task of building his new wooden shed before beginning to enjoy it! The process of building the shed starting with the floor, then the walls, the roof and finally the doors and windows! Much easier said than done!
Richard said: “The choice for the shed base was because it seemed a simpler and neater solution than a solid concrete base, I would also be using less of the planet’s resources.”
Conclusion
A huge thank you to Richard for choosing to use our products and then for sharing photos and details of his two installations to allow us to create this case study. We’re sure he is delighted with the outcome of both and we agree they look great.
Richard told us: “I’m very pleased with the outcome of my projects. I hope my case study might encourage others to do something similar.”
If you have any photos of your project to share with us simply email the images to sales@matsgrids.co.uk and you could have your own case study like Richard! Or if you have any questions about our products then please do not hesitate to contact us.